HOW TO PUT AN IRON ON PATCH – 10 BEST TIPS AND TRICKS

Iron-on patches are a quick and easy way to apply a design or repair fabric without sewing. To use them, you simply place the patch on the fabric, apply heat from an iron, and press it for a few seconds. The heat activates the adhesive on the patch, causing it to bond securely to the fabric. This process is incredibly practical for quick repairs or customizing clothing, bags, and other fabric items.
Iron-on patches are popular because they save time and effort compared to traditional sewing or stitching, offering a convenient way to make personalized fashion statements or cover up small imperfections. They’re durable, easy to use, and available in countless designs, making them an ideal solution for a wide range of DIY projects.
In this guide, we’ll walk you through the simple, step-by-step process to apply iron-on patches effectively, ensuring they stay securely in place for the long term. Whether you’re a beginner or experienced, you’ll find tips and techniques to help you get the best results every time.
Tools & Materials Needed
To apply an iron-on patch, you’ll need a few simple tools and materials:
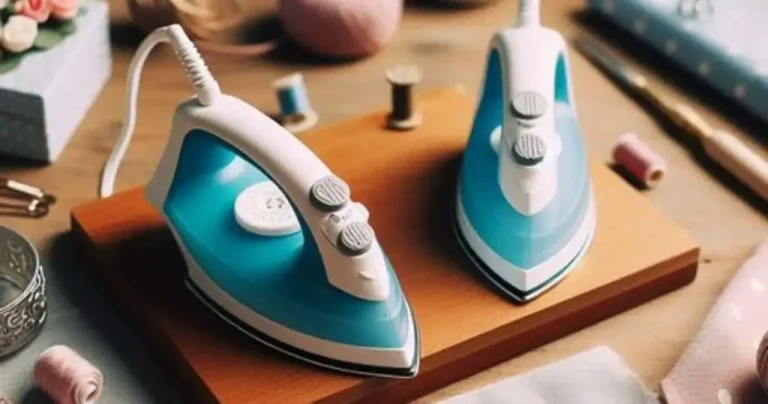
- Iron: A standard iron with a heat setting that works for your fabric.
- Heat-Resistant Surface: To ensure the fabric remains flat while applying the patch.
- Iron-On Patch: The design or repair patch you wish to attach.
- Thin Cloth or Parchment Paper: To protect the fabric and patch from direct heat.
- Garment: The item you’re applying the patch to, such as a T-shirt, jeans, or jacket.
Optionally, you can use a hair straightener as a substitute for the iron if you don’t have one available.
These are the basic materials you’ll need for a successful application, ensuring that the patch adheres properly to your fabric without any issues.

Step-by-Step Guide: How to Apply an Iron-on Patch
To apply an iron-on patch, follow these simple steps:
Prepare Your Garment
Make sure the fabric is clean, dry, and wrinkle-free. Lay it flat on a hard, sturdy surface like an ironing board to ensure a smooth application.
Set Your Iron
Set the iron to medium-high heat or the cotton setting, depending on the fabric type. Avoid using steam as moisture can interfere with the adhesive bond.
Position the Patch
Place the patch adhesive side down, exactly where you want it on the fabric. If needed, mark the position for precise placement.
Cover the Patch
Place a thin cloth or parchment paper over the patch to protect both the fabric and the design from direct heat.
Press the Patch
Apply firm, even pressure with the iron for 30 to 60 seconds, keeping the iron still to avoid shifting the patch and ensuring even heat distribution.
Press the Backside:
Flip the garment inside out and press the back of the patch for an additional 30 seconds to reinforce the bond.
Check the Patch
Allow the patch to cool for 1-2 minutes, then check the adhesion by gently lifting the edges. If necessary, repeat the pressing steps until the patch is securely attached.
Troubleshooting & Common Mistakes
If your iron-on patch isn’t sticking or is peeling after washing, don’t worry—there are simple solutions to fix it:
Patch Not Sticking
If the patch isn’t sticking, make sure you’re applying firm, even pressure with the iron for the recommended time. Reheat and reapply pressure to both the front and back of the patch if needed.
Frayed Edges
If the patch’s edges start to fray, try using a fabric glue around the edges or reinforce it with a stitch. This will help secure the patch in place and prevent further damage.
Peeling After Washing
If the patch starts to peel after washing, make sure to iron the patch again after the garment is completely dry. For long-term durability, you may also want to stitch the edges for added reinforcement.
Delicate Fabrics
For delicate fabrics like silk or wool, avoid direct heat and use a protective cloth or parchment paper. Test the patch in a small, inconspicuous area first to ensure no damage occurs.
Thicker Fabrics
When applying patches to thicker fabrics like denim, increase the application time and apply extra pressure to ensure the adhesive bonds properly. You may also want to iron the patch from both the front and back to ensure a stronger hold.
Tips for Successful Iron-on Patch Application
To ensure your iron-on patch adheres perfectly and lasts, follow these expert tips:
Test the Patch First
Before applying the patch to your garment, test it on an inconspicuous area to make sure it won’t damage the fabric. This is especially important for delicate or high-end fabrics.
Use Additional Heat for Thicker Fabrics
For thicker fabrics like denim or canvas, apply extra heat by pressing the patch from both the front and back. This ensures a stronger adhesive bond.
Leave Room Between Multiple Patches
When applying multiple patches, leave a little space between each one. This prevents overlapping and ensures that each patch has enough surface area to stick properly.
Allow Patches to Cool
After pressing, let the patches cool completely before touching or moving them. This ensures that the adhesive has set properly, giving the patch a stronger, long-lasting hold.
Alternative Methods for Attaching Patches
If you don’t have an iron or need a more permanent solution, there are several alternative methods for attaching patches:
Using Fabric Glue
Fabric glue is a great option when ironing isn’t possible. Simply apply a thin layer of glue to the back of the patch, position it where you want, and press it firmly. Allow it to dry completely for a durable hold.
Sewing
If you want a more permanent option, sewing the patch onto your garment ensures it stays in place, even with frequent washing. Use a needle and thread that matches the color of the patch for a neat finish.
Using a Hair Straightener
A hair straightener can be used as a substitute for an iron. Simply heat the straightener, place it over the patch, and apply pressure for 30 to 60 seconds, just like you would with an iron.
What material do patches stick to best?
In the world of iron-on patches, the materials they adhere to can significantly impact the longevity and overall appearance of your designs. While iron-on patches can stick to a variety of fabrics and materials, some surfaces yield better results than others. Understanding which materials work best with iron-on patches will help you choose the ideal canvas for your creative projects.
Here is a comprehensive table outlining the materials that patches stick to best:
| Material | Suitability for Iron-On Patches |
| Cotton | Excellent adhesion and easy application for iron on patch |
| Denim | Ideal for patches, holds well over time |
| Canvas | Sturdy surface, patches adhere effectively |
| Twill | Great for patches, provides a smooth finish |
| Polyester | Good adhesion, but test with low heat first |
| Blends (Cotton/Polyester) | Usually works well, test before ironing |
| Wool | Generally suitable, use low heat and press |
| Felt | Suitable for some patches, check instructions |
| Nylon | Tricky to adhere, consider sew-on patches |
| Leather | Not recommended, better for sew-on patches |
Remember, before learning how to put an iron on patch, it’s essential to test a small corner of the fabric first to ensure it can withstand the heat. Additionally, some patches come with specific instructions or guidelines for different materials, so be sure to check the packaging or product information provided by the manufacturer.
By selecting the right materials and following our step-by-step guide, you’ll be well on your way to creating eye-catching and long-lasting iron-on patch designs on your favorite items!
What is the best iron on patch temperature?
For optimal results when ironing on patches with cotton fabric, it is recommended to set your iron to 350°F. When working with denim, it is best to use the highest temperature setting available, which is typically around 450°F. For sheer fabrics, sewing on the patches is advised to achieve better and more secure results.
| Fabric Type | Iron on Patch Temperature | Iron on patch temperature setting |
| Cotton and Cotton Blends | 350-400°F or 175-205°C | Medium-High to High Heat |
| Denim and Canvas | 400-450°F or 205-230°C | Highest Heat Setting |
| Polyester | 300-340°F or 150-170°C | Medium Heat |
| Delicate Fabrics (Silk, Rayon, Nylon, etc.) | Sew On Patches Instead | Avoid Ironing |
Pro tip:
Always use a lower heat setting, and if possible, test a small area first to ensure the nylon can withstand the iron’s temperature. Additionally, consider sewing the edges of the patch for added durability on nylon materials.
5 important things to keep in mind when learning how to put on an iron on patch
When learning how to put an iron on patch always keep 5 main things in your mind:

10 DIY ideas for how to apply an iron on patch to a clothing
If you want to do something creative to your clothing gather some iron on patch and try these DIY ideas for how to put an iron on patch at home.

Patch Collage:
Create a patch collage on a denim jacket or vest by arranging multiple iron-on patches in an artistic and eye-catching layout.

Statement Sleeves:
Elevate plain sleeves of a t-shirt or sweatshirt by adding vibrant patches along the arms for a bold and trendy look.

Pocket Accents:
Add a touch of charm to your jeans or shirts by applying small iron-on patches to the pockets for a playful and unique twist.

Colorful Cuffs:
Transform the cuffs of a long-sleeved shirt or cardigan with coordinating iron-on patches to showcase your personal style.

Personalized Backpack:
Customize your backpack by ironing on patches that represent your interests, hobbies, or favorite characters.

Athletic Appeal:
Add iron-on patches with motivational quotes or sporty symbols to workout clothes, gym bags, or even sports uniforms.

Monogram Magic:
Personalize your clothing with iron-on alphabet patches to display your initials or create custom monograms on shirts, sweatshirts, or hats.

Patch Patterns:
Create geometric patterns or stripes by arranging iron-on patches in a specific sequence on a blank canvas like a plain canvas tote or pillow cover.

Vintage Vibe:
Re-purpose vintage handkerchiefs, scarves, or bandanas by ironing on patches to refresh their style and turn them into trendy accessories.

Color-Block Chic:
Experiment with color-blocking by combining patches in different shades to give a contemporary and artistic flair to your outfits.

How to remove iron on patches?
Removing iron-on patches is a straightforward process. Start by gently heating the patch with an iron on a low setting to soften the adhesive. Then, use a pair of tweezers or your fingers to peel off the patch slowly. If there is any residue left on the fabric, place a piece of parchment paper over it and iron again to lift off the remaining adhesive. With a little care and patience, you can easily remove iron-on patches without damaging your clothing.

Conclusion
To apply an iron-on patch successfully, follow the steps carefully, ensuring each part of the process is done with the right technique and attention to detail. This will ensure the patch adheres securely and lasts for a long time, enhancing your garment or accessory with ease.
We encourage you to try these methods and share your results. Whether it’s customizing a jacket, repairing a T-shirt, or adding a fun design to a bag, you’ll enjoy the process and the final outcome. Don’t forget to test on a small area first and ensure the adhesive bonds properly for lasting durability.
Share your insights by emailing us or contact us by clicking the button below for further tips, questions, or to discuss your experience with iron-on patches.
How to Iron on patches?


