HOW TO M1 IN KNITTING: MAKE ONE STITCH EASILY
In the captivating realm of knitting, there exists a stitch that garners admiration and fascination from knitters worldwide—the M1 in knitting. This remarkable technique showcases the true artistry and versatility of knitting, captivating both seasoned enthusiasts and curious beginners. With a simple pair of needles and a thread, M1 in knitting unveils a world of creative possibilities, allowing crafters to weave their own tapestry of beauty.
Join me on an inspiring journey as we explore the wonders of M1 in knitting, a craft that seamlessly combines tradition with innovation, leaving us in awe of the limitless artistry found in every single stitch.
What is m1 in knitting?
In the world of knitting, the M1 (Make One) technique holds a significant place as a commonly used method for increasing stitches. When a pattern calls for M1 in knitting, it means adding a new stitch to the fabric in a seamless and virtually invisible manner. The M1 increase can be executed in different ways, such as M1L (Make One Left) or M1R (Make One Right), each resulting in a slightly different effect. To perform M1L, the knitter lifts the horizontal strand of yarn between two stitches from the front, then inserts the left needle from the back to knit into the back loop of this strand.
M1R, on the other hand, involves lifting the strand from the back, inserting the left needle from the front to knit into the front loop of the strand. These increases are typically used to shape garments, create decorative patterns, or widen a project. The beauty of M1 lies in its simplicity and versatility, making it an essential skill for knitters seeking to expand their repertoire and achieve intricate designs with flawless craftsmanship.
How to M1 in knitting – Step by step
Here is the step-by-step tutorial on how to perform the M1 in knitting:
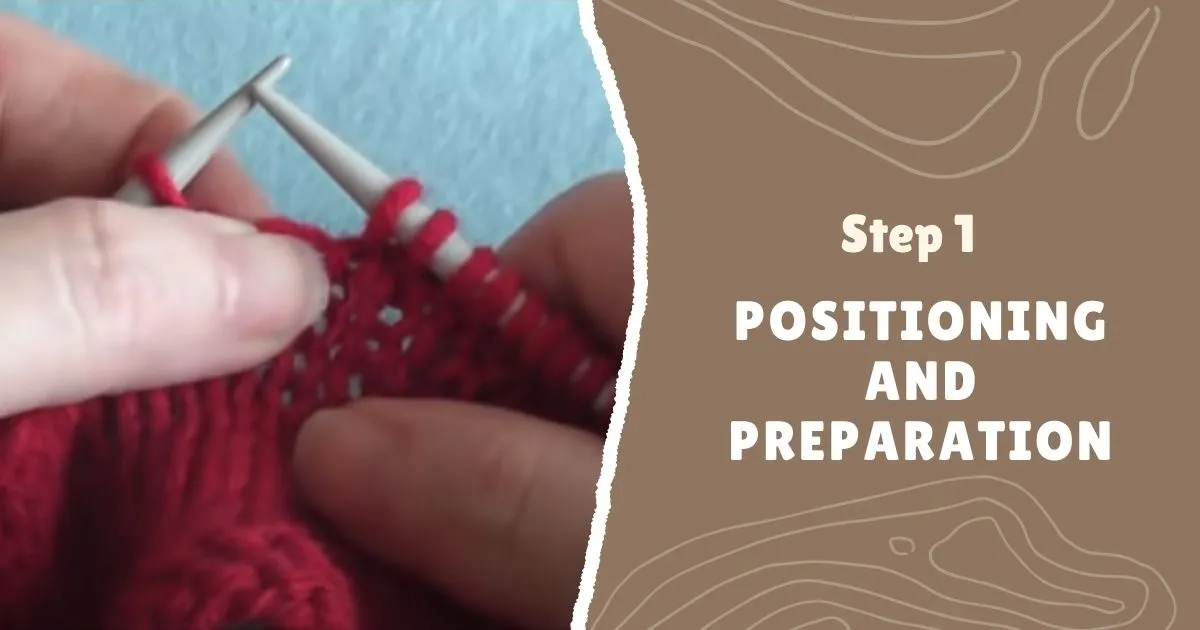
Step 1: Positioning and Preparation
Start with your working yarn at the back of the work, ready to knit the next stitch. Ensure that your knitting needles and yarn are comfortably positioned for easy manoeuvring.
Step 2: Identify the Bar of Yarn
Take a moment to identify the horizontal bar of yarn that runs between two existing stitches on your left-hand needle. This bar of yarn will be the focus of the M1 increase.

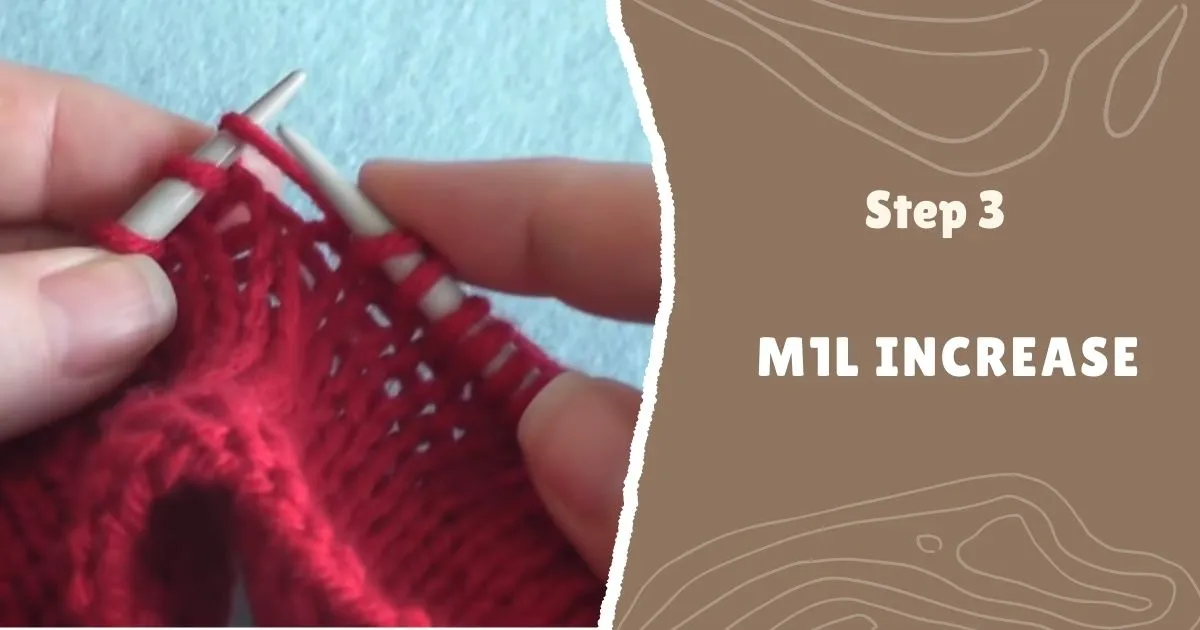
Step 3: M1L Increase for a Make One Left (M1L) increase
Insert the left needle from the front to the back, lifting the bar of yarn onto the left needle to create a new stitch.
Make sure the left needle goes under the bar of yarn, coming out at the back of the work.
Now you have successfully added a new stitch onto the left needle.
Step 4: M1R Increase for a Make One Right (M1R) increase
Insert the left needle from the back to the front, lifting the bar of yarn onto the left needle to create a new stitch.
Ensure that the left needle goes under the bar of yarn, coming out at the front of the work.
You have now successfully added a new stitch onto the left needle.

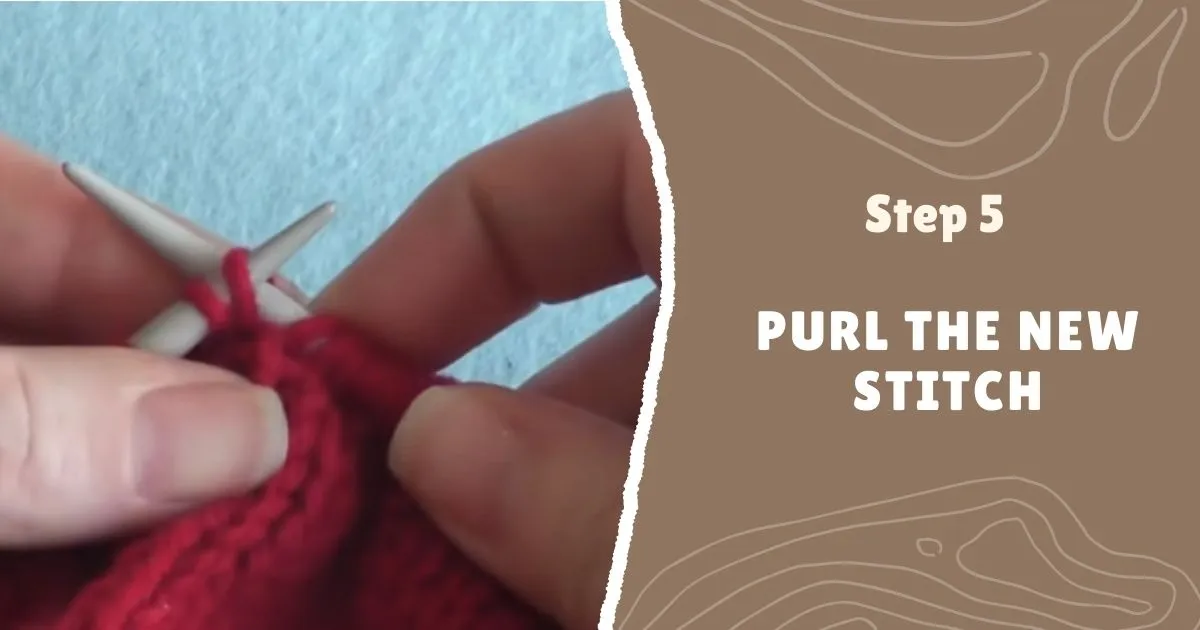
Step 5: Knit or Purl the New Stitch
Once you have created the new stitch using either the M1L or M1R increase, continue by knitting or purling it as required by your knitting pattern. Treat the new stitch like any other stitch on your needle.
Step 6: Continue Working through the Pattern
With the new stitch incorporated, continue working through the rest of your knitting pattern, following the specified instructions for subsequent stitches. Remember to maintain the correct tension and pattern sequence as you progress.
By mastering the M1 in knitting technique, you gain the ability to shape your knitting, add decorative patterns, and widen your project as needed. It’s advisable to practice M1 in knitting, make one increases on small swatches or sample pieces before integrating them into larger projects. Over time, you’ll become more comfortable with this versatile technique, allowing you to create beautifully shaped garments and intricate designs effortlessly.

What is m1L?
M1L (Make One Left) is a specific type of increase technique used in m1 in knitting to create a new stitch that slants to the left. This technique is commonly employed when shaping garments or creating decorative patterns within a knitted piece.
To execute the M1L increase, the left needle is inserted from the front to the back under the horizontal bar of yarn that lies between two existing stitches. That is actually a part of m1 in knitting.By doing so, a new stitch is formed on the left needle. This new stitch is then treated like any other stitch in the knitting pattern, allowing for seamless integration into the fabric.
The utility of the M1L increase lies in its ability to add stitches while maintaining a visually pleasing symmetry in the knitted piece. It is often used in conjunction with other increase and decrease techniques to shape the garment, create intricate lace patterns, or form symmetrical designs. By incorporating M1L increases at specific points within a knitting project, the fabric gains a gradual slant to the left, resulting in an aesthetically pleasing outcome.
M1L increases (in m1 in knitting) are versatile and can be used in a wide range of knitting projects, such as sweaters, shawls, hats, and mittens. They allow knitters to add stitches in a controlled manner, ensuring that the overall design remains balanced and visually appealing. With practice, knitters can confidently employ the M1L increase to achieve beautifully shaped and intricately patterned garments, showcasing their skill and creativity in the art of knitting.

What is m1R?
M1R (Make One Right) is a commonly employed knitting technique used to increase stitches and create a new stitch (in m1 in knitting) that slants to the right within the fabric. This increase method serves various purposes in knitting patterns, such as shaping garments, incorporating decorative elements, or expanding the width of a project.
To execute the M1R increase, insert the left needle from the back to the front under the horizontal bar of yarn located between two existing stitches. By lifting the bar of yarn onto the left needle, a new stitch is formed. This new stitch seamlessly blends with the surrounding fabric and is subsequently treated like any other stitch in the knitting pattern.
The utility of the M1R increase lies in its ability to add stitches while maintaining a sense of balance and visual harmony in the knitted piece. When combined with other increase and decrease techniques, M1R assists in shaping the garment, creating intricate lace patterns, or achieving symmetrical designs. By strategically incorporating M1R increases at specific points within a knitting project, the fabric develops a gradual slant to the right, enhancing the overall aesthetic appeal.
M1R increases find versatile applications in various knitting projects, such as sweaters, shawls, hats, and mittens. They provide knitters with a controlled method of adding stitches, ensuring the desired shape and symmetry of the final piece. Through practice and mastery of the M1R increase, knitters can confidently bring forth beautifully shaped garments and intricate designs, showcasing their expertise and artistry in the realm of knitting.
How are m1L and m1R different?
M1L (Make One Left) and M1R (Make One Right) are two distinct knitting increase techniques that differ in the direction in which the new stitch is slanted (in m1 in knitting).
M1L creates a new stitch that slants to the left, while M1R creates a new stitch that slants to the right. These slants play a crucial role in shaping the fabric and achieving specific design elements in knitting projects.
By using M1L and M1R strategically and in combination with other knitting techniques, knitters can create beautiful patterns, textures, and garment contours that enhance the overall visual appeal of their creations.
Read More: What is seed stitch in knitting?
Tips for M1 in knitting
Here are a few helpful tips for executing M1 in knitting
By keeping these tips in mind and practicing the M1 increase technique, you’ll become more confident in executing clean and precise increases in your knitting projects, allowing you to shape your garments and create stunning designs.

How to M1R (make one right) and M1L (make one left)
Conclusion
In conclusion, the M1 (Make One) increase technique in knitting is a versatile and valuable skill that opens up a world of creative possibilities. Whether you’re shaping a garment, adding decorative elements, or expanding the width of your project, M1 increases play a crucial role in achieving seamless and balanced results. By lifting the bar of yarn and creating a new stitch, M1 allows for the seamless integration of additional stitches into the fabric, enhancing its overall aesthetic appeal. With practice and attention to detail, knitters can master the M1 technique and utilize it to bring their unique visions to life. So, embrace the artistry of M1 knitting, and let your stitches soar with newfound elegance and precision.


