What is Nap in Sewing : Ultimate Guide (With Examples)
What is Nap in Sewing?
Sewing enthusiasts and seasoned sewists alike often encounter the term “nap” when working with certain fabrics, but what exactly does it mean? In its simplest form, nap refers to the raised texture or surface on fabrics like velvet, corduroy, and suede. This texture, which can be felt by gently running your hand over the fabric, is caused by the direction of the fibers or pile that make up the fabric. It’s this directionality that affects not only how the fabric feels but also how it behaves when sewn and worn.
Defining Nap in Fabrics
So, what exactly is nap in fabric? To put it plainly, nap is the collection of fibers that stand up off the fabric’s surface, often creating a soft, tactile texture. Fabrics like velvet and corduroy are prime examples of fabrics that feature a distinct nap. When you rub your hand across these materials, you may feel a subtle difference depending on the direction in which you’re stroking the fabric. This direction is what we refer to as the “fabric pile direction”.
When sewing with napped fabrics, understanding the nap’s direction is crucial. The nap can often look different depending on which way it’s laid out—sometimes lighter, sometimes darker. This visual difference is why nap needs to be carefully considered in the layout process, especially when matching seams and sewing patterns.
Importance of Nap in Sewing Projects

But why does nap matter so much in your sewing projects? Well, working with napped fabrics isn’t just about creating a visually appealing garment—it’s also about achieving the right aesthetic impact and ensuring texture consistency. The direction of the nap can significantly alter the appearance of the final product. For instance, the light may reflect differently depending on whether the fibers are brushed up or down. That’s why paying attention to fabric direction when cutting your pieces and matching your seams is so important.
Imagine this: you’ve picked out a gorgeous velvet fabric for a new jacket, but you accidentally cut one sleeve with the nap going in a different direction than the body panels. What do you get? An uneven, inconsistent finish that could look unintentional. That’s why it’s essential to keep the nap direction consistent throughout your entire project.
On top of that, napped fabrics often require special sewing techniques to maintain their integrity. For example, pressing needs to be done carefully to avoid flattening the nap, and you may need to adjust your sewing machine settings to handle the texture properly. But don’t worry—once you’ve mastered the art of working with nap, it’s a whole new world of sewing possibilities! From plush velvet upholstery to soft, textured garments, the aesthetic possibilities are endless.
Types of Nap in Fabrics
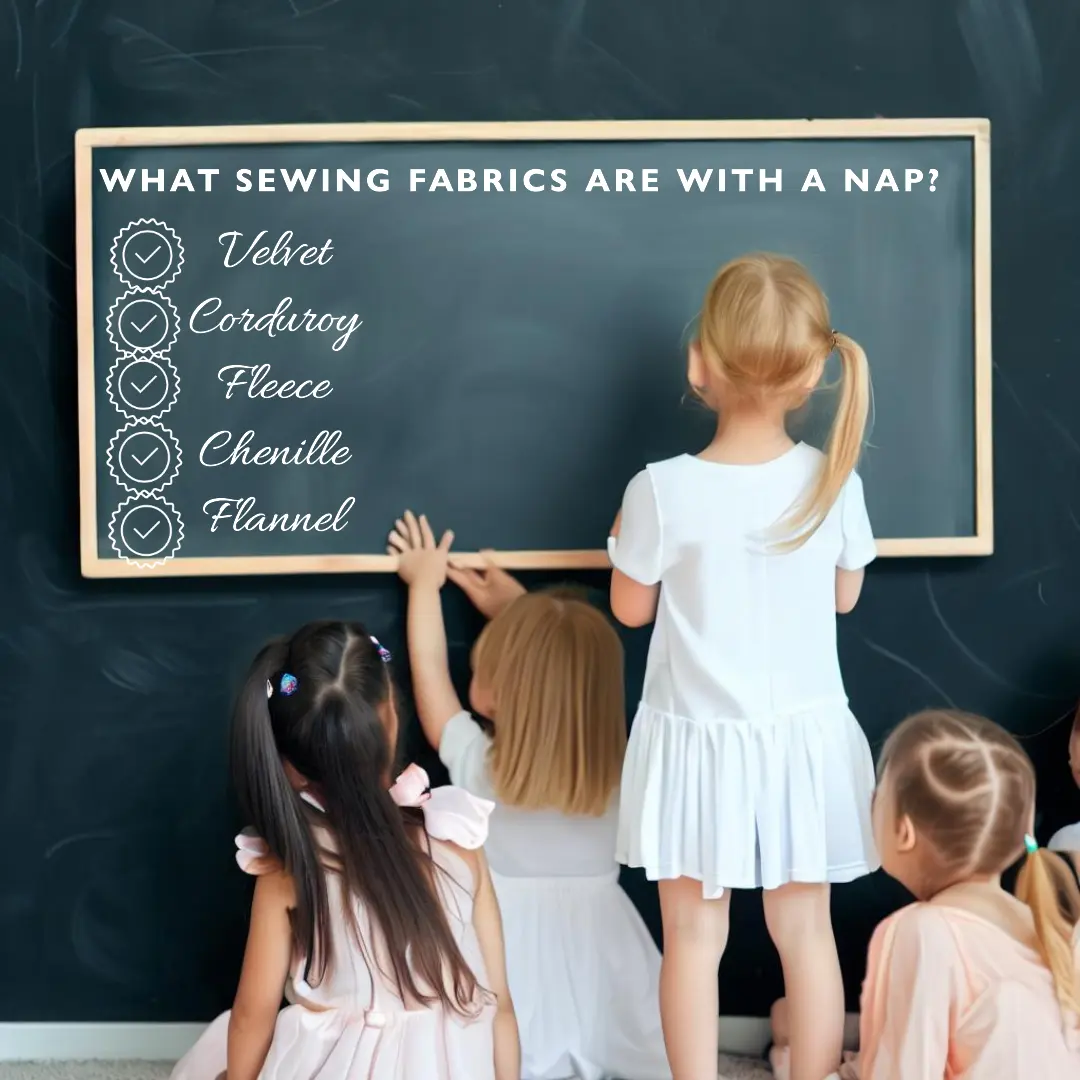
When it comes to working with fabrics that feature a distinct nap, understanding the different types is essential for achieving the best results. Each fabric has unique characteristics, and the way its nap behaves can impact your sewing process and the final look of your project. Let’s explore some of the most common napped fabrics and how to approach sewing with them.
Velvet
Velvet is one of the most iconic napped fabrics out there. It’s luxurious, soft to the touch, and carries a rich, reflective quality that makes it perfect for evening wear, upholstery, and high-end fashion projects. What sets velvet apart is its unique texture: the pile, which consists of cut fibers, creates that plush, velvety feel. This texture gives velvet its signature sheen, but it also introduces one of the biggest challenges in working with it—directionality.
When you’re sewing with velvet, the direction of the nap plays a huge role in how the fabric looks. Velvet can appear darker or lighter depending on which way the fibers lie. Sewing with the nap facing the same direction throughout your project ensures a uniform, smooth appearance, while inconsistent nap directions can create unwanted variations in color and texture.
“One of the best ways to handle tricky fabrics like velvet is to use a walking foot. This simple attachment helps control both the top and bottom layers of the fabric, preventing shifting. Also, never underestimate the importance of pressing—use a low heat setting or a steam iron to avoid crushing the pile.”
David Miller, Sewing Instructor
Consider the visual impact this can have—imagine making a velvet dress and accidentally cutting one sleeve with the nap going in the opposite direction. You’d end up with a noticeable difference in the way the fabric catches the light, and your project would look less polished. To keep that luxurious look intact, always cut your velvet pieces with the nap flowing in the same direction and press carefully to avoid flattening the fibers.
Corduroy
Corduroy is another napped fabric that has a distinct texture, but instead of a soft, plush feel like velvet, corduroy features ribbed lines made from raised fibers. These ribs give corduroy its characteristic look and can vary in width, from fine-wale to wide-wale corduroy. While it might not have the same luxurious sheen as velvet, corduroy is still a fantastic fabric for creating everything from durable pants to stylish jackets.
When sewing with corduroy, the nap—referred to here as the direction of the ribs—needs careful attention. As with velvet, cutting against the nap can cause visible lines that disrupt the consistency of the fabric. So, just like with velvet, be sure to cut and lay out your pattern pieces with the nap aligned in the same direction. This will help the finished garment look uniform and smooth.
Additionally, corduroy requires special care during the sewing process. Use a walking foot or a double needle to avoid stretching or distorting the ribs, and make sure to press the fabric gently to avoid crushing the texture. With a little extra care, corduroy can create stylish, long-lasting garments that stand the test of time.
Suede is one of those fabrics that seems intimidating, but with the right care, it’s incredibly versatile. When working with suede, I always recommend using a teflon foot because it lets the fabric glide under the machine without sticking. Also, remember that suede isn’t as forgiving as velvet—so you need to be more precise with your cuts and seams.
Emily Johnson, Tailor and Designer
Other Napped Fabrics
While velvet and corduroy are among the most well-known napped fabrics, there are plenty of other options worth exploring. Velour, moleskin, and plush fabrics all feature distinctive naps, each with its own unique properties.
- Velour: Similar to velvet, velour has a rich, soft texture, but it’s often made from stretch materials, making it ideal for more fitted clothing. Like velvet, velour requires attention to nap direction to ensure consistent color and texture across your project.
- Moleskin: Known for its durability and soft, brushed feel, moleskin is commonly used for outerwear and work garments. While it’s thicker than velvet and corduroy, moleskin still has a noticeable nap that needs to be considered when cutting and sewing. Pressing moleskin with care is crucial to preserve its soft texture.
- Plush: Often used for blankets, stuffed animals, and upholstery, plush has a deep pile that gives it a super-soft, velvety feel. Working with plush fabrics can be tricky, as the fibers can shift easily during sewing. Take care to stabilize plush fabrics and always sew in the direction of the nap to prevent distortion.
These fabrics all offer different textures and finishes, but they share one common factor: the need to pay attention to fabric pile direction and nap consistency. Whether you’re working with velour, moleskin, or plush, always keep the nap aligned to ensure your project looks polished and professional.
“When sewing with napped fabrics, the most common mistake I see is ignoring the fabric’s direction. Always make sure to cut your patterns following the pile direction to maintain consistent texture. For instance, when working with corduroy, the fabric should be cut in a way that the ribs are all going the same way—this ensures uniformity and avoids uneven texture.”
Jane Adams, Fabric Specialist
Comparative Charts for Napped Fabrics
Understanding the differences between various napped fabrics is crucial for any sewing project. Each fabric type—whether it’s velvet, corduroy, or suede—has its unique texture, care needs, and sewing techniques. To help you navigate these materials, let’s break down the essential features of these fabrics side by side.
| Fabric | Texture | Sewing Techniques | Care Tips |
|---|---|---|---|
| Velvet | Luxurious, soft pile with a rich texture | Use a walking foot to prevent fabric from slipping. Be cautious of fabric distortion. | Hand wash or dry clean for best results. Iron on low heat or use a steamer. |
| Corduroy | Ribbed texture, with visible lines running vertically | Cut with the grainline to ensure even ribs. Use a jeans needle for heavy fabric. | Wash in cold water; dry on low heat to prevent shrinking. Avoid pressing directly on ribs. |
| Suede | Soft, slightly velvety, but more structured than velvet | Use a teflon foot to prevent sticking. Avoid pressing directly on the fabric. | Spot clean with a damp cloth. Use a suede brush to restore texture. |
As you can see, each fabric requires its own set of techniques to get the best results. Velvet demands a gentle approach to prevent damage to its delicate pile, while corduroy requires careful cutting and pressing to preserve its signature ribbed texture. Suede, on the other hand, is a more durable fabric but still needs special attention during care and sewing.
How to Work with Nap in Sewing
Working with napped fabrics can be a bit tricky, but with the right techniques and a little attention to detail, you can create stunning projects that showcase the beauty and texture of these fabrics. Here’s how you can navigate the challenges of working with nap in your sewing.
Choosing Patterns for Napped Fabrics
One of the most important decisions you’ll make when working with napped fabrics is choosing the right pattern. Why? Because the direction of the nap can significantly impact how the fabric behaves and looks in your finished project.
When selecting a pattern for napped fabrics, always consider the fabric’s texture and how it will affect the overall design. For example, when working with velvet or corduroy, you’ll want a pattern that complements the fabric’s rich texture, rather than one that competes with it. Consider simple designs that allow the fabric’s nap to be the focal point. For more intricate textures, like crushed velvet, a simple A-line dress or pants might showcase the fabric best.
Another important factor is the direction of the nap. With napped fabrics, always choose patterns that respect the fabric’s natural flow. Pattern layout with nap requires you to ensure that all pattern pieces are aligned with the nap in the same direction. This ensures consistency in the texture and color, avoiding the “watermark” effect, where the fabric reflects light differently in some areas.
Ultimately, pattern selection for nap is about harmony. Ask yourself: Does the pattern suit the fabric’s unique texture, and will the direction of the nap enhance the design?
Layout and Cutting Techniques
Now that you’ve chosen your pattern, it’s time to lay it out and cut your fabric. This step is critical when working with napped fabrics, as it can make or break your project. Cutting methods for napped fabric require careful attention to the fabric’s grain and nap direction.
When laying out your pattern pieces, it’s crucial to follow these steps:
- Align the nap direction: Place all pattern pieces with the nap facing in the same direction. If you’re working with a fabric like velvet, you’ll notice how much the light reflects differently depending on the direction of the nap. To maintain consistency, ensure that the pile direction flows the same way across all pieces.
- Use a sharp pair of scissors: Since napped fabrics can be a bit thicker or more textured, using sharp, precise scissors will help you cut through the fabric without distorting the pile.
- Avoid shifting fabric: Napped fabrics tend to shift or slide easily during the cutting process, so use pattern weights or pins to secure your pieces and prevent them from moving.
- Cut one piece at a time: To ensure precision, always cut one pattern piece at a time. This will help you manage the fabric’s direction and avoid mistakes.
Taking the time to properly lay out and cut your fabric respecting the nap direction ensures that your project will have a clean, professional finish.
Sewing with Napped Fabrics
Sewing with napped fabrics can be challenging, but with the right techniques, you can sew smoothly and preserve the fabric’s texture. The key is to use the correct stitching techniques and handle the fabric with care.
Here are a few tips for sewing with napped fabrics:
- Use a walking foot: A walking foot helps feed the fabric evenly through the machine, especially when working with thicker or textured napped fabrics like velvet or corduroy. This prevents the fabric from shifting or puckering.
- Sew with the nap direction: Always sew with the nap facing the right direction, which will reduce the risk of creating seams that disrupt the texture. If you sew against the nap, the seam may look uneven or have a noticeable “ridge.”
- Go slowly: Take your time, especially when working with delicate napped fabrics. Rushing through seams can cause the fabric to stretch, warp, or lose its nap.
- Use a fine needle: Napped fabrics like velvet and corduroy can be delicate, so using a fine needle ensures that the fabric doesn’t get damaged as you sew.
By incorporating these techniques into your sewing routine, you’ll be able to create smooth, professional seams while maintaining the integrity of the nap.
Pressing Guidelines for Napped Fabrics
Pressing is an essential step in sewing with napped fabrics, but it requires special care. The heat from an iron can flatten the fabric’s nap if you’re not careful. To avoid this, follow these important guidelines:
- Use a low heat setting: Always set your iron to a low or medium heat to prevent damage. High heat can crush the delicate fibers of napped fabrics, leaving them flat and lifeless.
- Press, don’t iron: Instead of sliding the iron back and forth, use the pressing motion (lifting and lowering the iron) to gently press the fabric. This helps preserve the texture of the fabric without disturbing the nap.
- Use a pressing cloth: When pressing, place a pressing cloth over your fabric. This will protect the nap and prevent any direct contact between the iron and the fabric.
- Steam is your friend: A bit of steam can help release wrinkles without flattening the fabric. However, don’t overdo it—just a light touch is all you need.
By following these pressing guidelines, you’ll ensure that the nap of your fabric remains intact, giving your project that beautiful, textured finish.
With these expert tips, you’ll be well-equipped to tackle sewing with napped fabrics confidently. Whether you’re making a luxurious velvet gown or a stylish corduroy jacket, knowing how to work with the nap will help you achieve flawless results every time. Keep these techniques in mind as you sew, and your projects will look polished, professional, and truly stunning.
Advanced Tips for Working with Nap
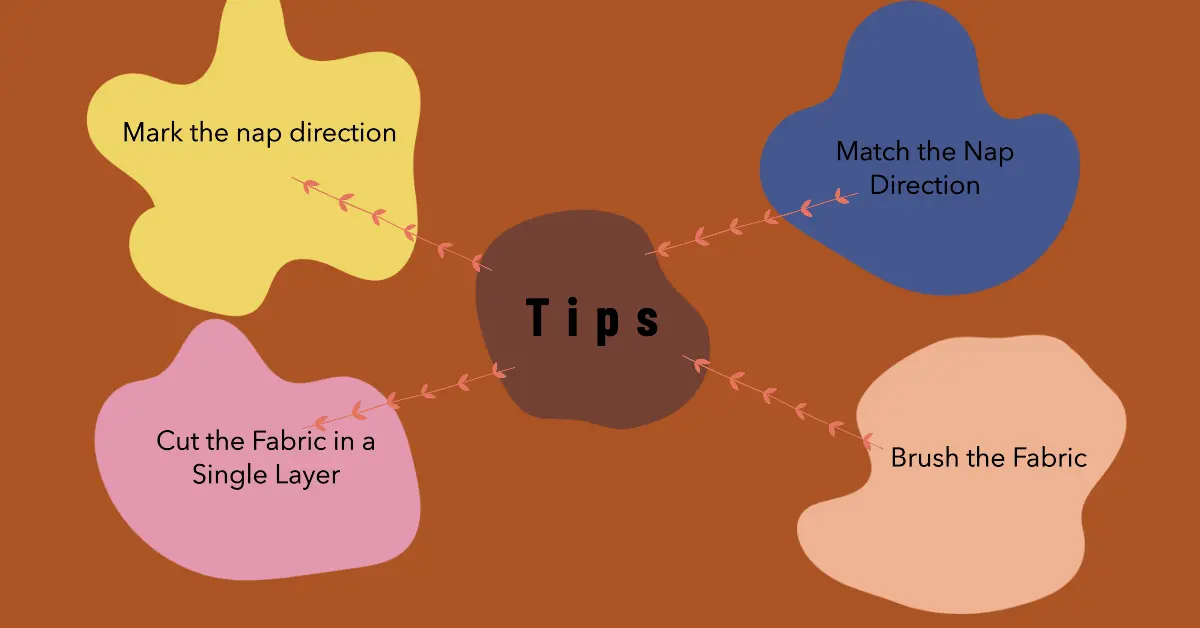
As you become more comfortable working with napped fabrics, you may encounter some challenges that require a bit more expertise. But don’t worry—these advanced tips will help you overcome common issues, perfect your finishing techniques, and even introduce sustainable practices. Let’s dive in!
Troubleshooting Common Nap Problems
Working with napped fabrics often comes with its set of challenges. Fabric distortion, mismatched nap, and tricky textures can make your project seem like an uphill battle. But with the right troubleshooting techniques, you can solve these issues like a pro.
One of the most common problems is fabric distortion. Napped fabrics, particularly velvet or corduroy, can easily stretch or shift during sewing. If you’re noticing this, try using a walking foot to keep the fabric feeding evenly through the machine. Additionally, pinning or using pattern weights is crucial to prevent the fabric from moving out of alignment.
Another frequent issue is a mismatched nap. Imagine finishing your project only to discover that parts of the fabric reflect light differently, giving the project an uneven appearance. To avoid this, always make sure that the nap direction is consistent across all pattern pieces. To align the nap direction properly, always lay your pattern pieces in one direction, either up or down, and check that the pile is going the same way on each piece. If the fabric has an obvious texture shift, like with velour or velvet, this attention to detail will make sure your project looks flawless.
Lastly, some tricky fabrics, such as moleskin or plush, can be a nightmare to sew with if not handled properly. These fabrics often have a dense pile, making it hard to see your stitching. To solve this, use a heavy-duty needle and a longer stitch length to ensure smooth sewing without getting tangled in the texture.
Professional Finishing Techniques for Napped Fabrics
Once your project is sewn, it’s time to focus on finishing techniques. Properly finishing your seams and edges is critical to maintaining the integrity of the fabric’s nap. It’s all about preventing fraying and ensuring a clean, professional look.
When working with napped fabrics, consider using French seams or serging for a neat, enclosed finish. These methods keep the edges tidy and prevent the pile from catching on raw fabric edges. For velvet or corduroy, the added benefit of French seams is that they add structure without flattening the fabric’s texture.
Another technique is bias-bound edges. This method involves folding the edge of the fabric and binding it with a bias strip. It’s perfect for fabrics like corduroy or moleskin, as it not only protects the edge but also adds a professional touch.
For velvet, where seams can be more visible, consider using understitching. This technique involves sewing the seam allowance to the lining or underlining to ensure it doesn’t shift or roll out. It works wonders on heavier napped fabrics, ensuring your seams stay in place without disrupting the natural flow of the fabric.
Zero Waste Approaches for Napped Fabrics
Sustainability is becoming an increasing focus in the world of sewing, and zero waste approaches are an excellent way to maximize your fabric use—especially with napped fabrics that can be a bit more expensive.
Here are some creative ways to reduce waste:
- Repurpose fabric scraps: Don’t throw away those small pieces of fabric! Napped fabrics can be used for small accessories like pillows, bags, or even scrap quilts. These small projects can showcase your fabric’s texture while minimizing waste.
- Pattern matching for efficiency: If you’re making a larger garment, like a coat or jacket, you may have some extra fabric once the pieces are cut out. Consider using this extra fabric for matching details such as pocket linings, cuffs, or even trim for other garments. This gives your leftover fabric new life and can create a cohesive look.
- Upcycling older garments: If you’ve got an old velvet or corduroy item hanging around, consider upcycling it into something new. A jacket can become a stylish skirt, or a pair of old trousers could be transformed into a bag. This way, you’re not only reducing fabric waste but also creating something new from what you already own.
Adopting zero waste techniques when working with napped fabrics not only helps reduce your environmental impact but also sparks creativity in how you approach fabric and design.
By implementing these advanced tips, you’ll tackle even the most challenging aspects of working with napped fabrics. Whether you’re troubleshooting common problems, perfecting your finishing techniques, or adopting sustainable sewing practices, these insights will help you elevate your sewing game. Embrace these strategies, and you’ll find that working with napped fabrics is a rewarding experience.
Special Applications and Innovations in Napped Fabrics
Napped fabrics are not only staples in traditional garment making but have also found a place in innovative design and sustainable practices. As trends evolve, so do the fabrics and techniques used to work with them. Let’s explore some of the most exciting developments in the world of napped fabrics and how they’re reshaping the sewing landscape.
Modern Napped Fabrics
In recent years, the world of napped fabrics has seen a surge in modern innovations. One of the most exciting trends is the development of eco-friendly velvet. Velvet, traditionally made from synthetic fibers, is now being crafted from recycled materials or organic fibers, making it a more sustainable choice for environmentally-conscious designers. Whether it’s through the use of recycled polyester or organic cotton, this shift is not only better for the environment but also helps create high-quality fabric that retains the luxurious feel we know and love.
In addition to velvet, tech fabrics are making waves in the napped fabric category. Smart textiles now feature integrated properties such as moisture-wicking, temperature regulation, or even antimicrobial coatings. These innovations make napped fabrics more practical and versatile for modern clothing. Imagine wearing a corduroy jacket that helps regulate your body temperature or a velvet dress that’s not only stunning but also breathable and easy to care for. As these innovations become more prevalent, they open up new possibilities for napped fabric applications, offering both form and function.
Digital Patterns and Napped Fabrics
Gone are the days of manually drawing out patterns and carefully measuring each piece of fabric. With the advent of digital patterning tools, designers and seamstresses alike now have the ability to optimize their pattern layout with nap. This technology allows for more precise placement of patterns on fabric, reducing fabric waste while ensuring that the nap direction remains consistent throughout the entire project.
The accuracy of digital pattern-making is especially beneficial when working with napped fabrics. Fabrics like velvet or corduroy can be notoriously difficult to cut, as even slight misalignments in the nap direction can affect the overall look of the finished garment. Digital tools ensure that the pile direction is respected, preventing the fabric from appearing uneven or mismatched. This technology not only helps save fabric but also streamlines the production process, making it easier to achieve a professional-quality result with every project.
Additionally, 3D simulation tools can visualize how the fabric will behave when sewn, giving you a preview before cutting into your fabric. This level of precision and foresight reduces the chances of costly mistakes, ensuring your pattern layout and fabric use are as efficient as possible.
Fabric Care and Maintenance
Proper fabric care for napped fabrics is essential to ensuring their longevity and maintaining their beauty. After all, what good is a stunning velvet dress or a cozy corduroy jacket if it loses its texture and shine after a few washes?
Let’s start with velvet. When caring for velvet, avoid machine washing. Instead, opt for gentle hand washing or dry cleaning. If you do decide to wash it at home, make sure to turn the garment inside out to preserve its pile. Always air dry velvet to avoid crushing the fibers. Steaming can also help revive its plush texture, but be cautious not to place the fabric too close to the steamer.
For corduroy, washing can be a bit more straightforward, but it still requires care. It’s best to wash corduroy in cold water and dry it on a low heat setting. Always ensure that you’re washing the fabric with the pile going in the same direction to prevent any distortion. If your corduroy has a heavy texture, you might even want to press it lightly with a steam iron to flatten the ridges and enhance the fabric’s appearance.
When it comes to suede, the napped texture demands special attention. Suede cleaning requires special brushes to lift dirt and dust without damaging the fabric. In general, avoid water on suede, and instead, use a suede cleaner for spot treatment. For storing napped fabrics, ensure that the fabric is kept in a dry, cool environment and never folded for long periods. Hanging garments in a garment bag or padded hanger helps maintain the fabric’s structure.
Taking care of your napped fabrics properly will help preserve their stunning texture and ensure they look good as new for years to come.
These special applications and innovations in napped fabrics are reshaping how we approach sewing projects, from eco-friendly alternatives to cutting-edge technology. By embracing these trends, you can not only achieve professional-quality results but also ensure your napped fabrics are both sustainable and long-lasting. So, whether you’re exploring new fabric options or enhancing your skills with digital tools, the future of napped fabrics is bright and full of endless possibilities!
Expert Resources and Tools for Napped Fabric Projects
When working with napped fabrics, having the right tools and resources is essential for achieving professional results. Whether you’re just starting out or you’ve been sewing for years, the right equipment and knowledge can make all the difference in your projects. Let’s dive into some expert recommendations that will help you take your sewing with napped fabrics to the next level.
Recommended Tools for Napped Fabric Sewing
Working with napped fabrics like velvet, corduroy, or suede requires precision and care. To ensure your project turns out flawless, investing in a few specialty tools can make the job easier and more enjoyable. Here are some must-have tools for sewing napped fabrics:
- Specialty Needles: One of the most important tools for sewing with napped fabrics is the right needle. Ballpoint needles or universal needles with a rounded tip work best for fabrics like velvet and corduroy. They help prevent snags and damage to the fabric’s pile. If you’re working with very heavy corduroy or other thick fabrics, try a jeans needle for better penetration.
- Walking Foot: A walking foot is an essential tool for napped fabric projects. It ensures that both the top and bottom layers of fabric are fed evenly through the machine, preventing the fabric from shifting or puckering. This is especially important when working with velvet or other thick, textured fabrics that tend to stretch or slide under a standard foot.
- Fabric Scissors: Invest in a sharp pair of fabric scissors specifically for cutting napped fabrics. A clean, sharp cut will reduce the chances of fraying and will help preserve the fabric’s structure. Some scissors are designed with longer blades for cutting through thick fabric layers, which is particularly helpful for projects involving multiple layers.
- Clips Instead of Pins: Because napped fabrics can be delicate, using pins can sometimes leave unwanted holes or marks. Instead, fabric clips are a great option to hold your fabric in place without damaging it. These clips are especially useful when working with thick fabrics that are harder to pin.
- Rotary Cutter and Mat: A rotary cutter and cutting mat are perfect for achieving precise cuts, especially when you’re working with intricate patterns or when you need to cut fabric with the pile going in a specific direction. The rotary cutter is perfect for cutting long straight lines or curves, ensuring a smooth and clean finish.
Conclusion: Mastering the Art of Sewing with Napped Fabrics
Sewing with napped fabrics like velvet, corduroy, and suede offers endless creative possibilities, but it also requires skill, attention to detail, and the right tools. By understanding the unique characteristics of these materials, using proper techniques, and following expert advice, you can achieve professional-quality results every time.
From mastering fabric alignment and cutting techniques to leveraging innovative tools and sustainable practices, this guide equips you with the knowledge needed to tackle even the trickiest projects. Whether you’re designing luxurious garments, crafting unique home decor, or experimenting with modern fabric innovations, the principles and tips shared here will help you bring your creative visions to life.
So, don’t shy away from the challenges of napped fabrics—embrace them with confidence. With practice and the right resources, you’ll transform these beautiful but demanding materials into stunning, polished creations that stand out. Now, it’s your turn to take what you’ve learned and start sewing! What will you make next?

